Okay! Now, i want to give a tutorial about WHAT I USUALLY USE IN PHOTOSHOP CS3. Maybe it will make me easier to explain in next tutorial, and of course make u understand what i mean! (it just because my English is not very well, so i don't really know if you understand or no) hahahaha.
BASIC 1 :
SCREEN/SOFTLIGHT
I already tell you about this. All you have to do is duplicate the image twice (with ctrl+j and do it twice). Then, change the first Image Mode from NORMAL into SOFTLIGHT, and second image mode from NORMAL into SCREEN.
If you think it's too Bright, and too contrast.. You can modify the FILL (i recommend fill because it will make your image softer).
I hope this screen shot will help you to understand.
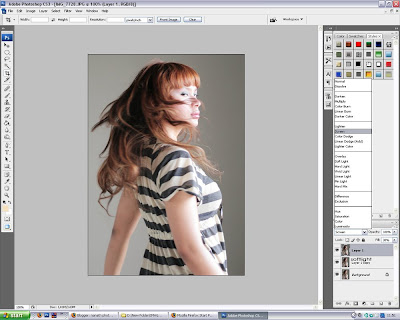
I really recommend SCREEN/SOFLIGHT thing to make your image brigther because it's really simple way to get it. Actually, you can do it with Curve, Bright and Contrast thing. Hmm... everything is really depend on your taste.. :)
BASIC2 :
SHADOW/HIGHLIGHT
In this work, i recommend you to use Photoshop CS3, because SHADOW/HIGHLIGHT doesn't exist in other photoshop version..
WHY SHADOW HIGHLIGHT? because, it will make your picture become more dimensional and alive. To find where SHADOW/HIGHLIGHT in photoshop cs 3 is :
Select Image>Adjustment>Shadow/Highlight
I hope this image will help you
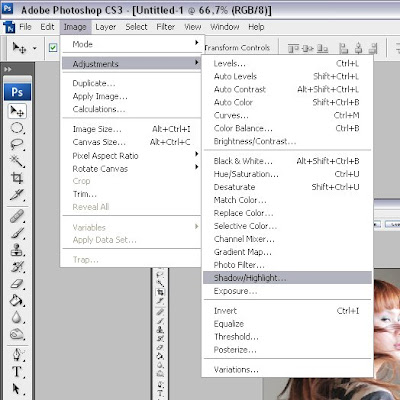
Now, you can play with the SHADOWHIGHLIGHT thing. I recommend you to change all number there into 0%. All of it! WHY? because you have to find your real color inside it.. :) believe me, it will help you to find out your real character of color.. :)
now, please click the image below. I hope it will help you..
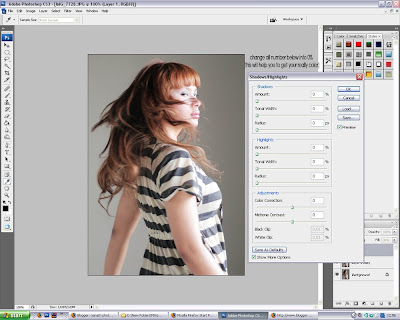
Modify the number as you want! As you like! As your taste! Because selecting the color of image like you searching wife or husband. it really DEPEND ON YOUR TASTE pal! :)
BASIC 3 :
MAKE IT SHARP!!
For you people, who really love sharp color, you can do this thing. I usually use this for my picture.. :) it will make your picture more vibrant.
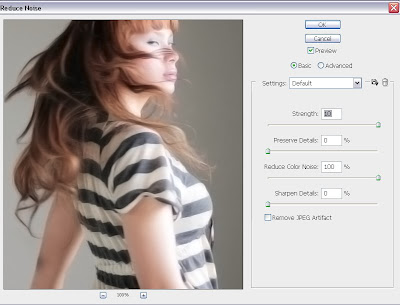
First thing you have to do is, DUPLICATE THE IMAGE (With Ctrl+J) > Select Filter > Noise > Reduce Noise. Then change the number into this (click the image below)
The next step is, select FILTER>OTHER>HIGHPASS. for make it clear, please click the image below.
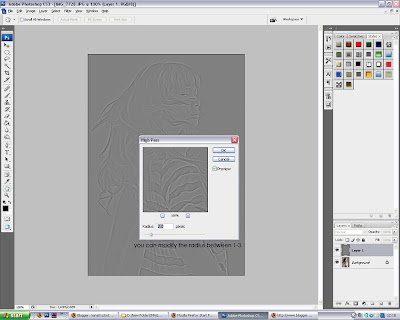
You can modify the range of radius between 1-3. It really depend on your image, if your image is large, maybe you need 3 pixel, but if your image is small, you just need 1 pixel.
Now, please change the Image mode into Linear Light like the image below
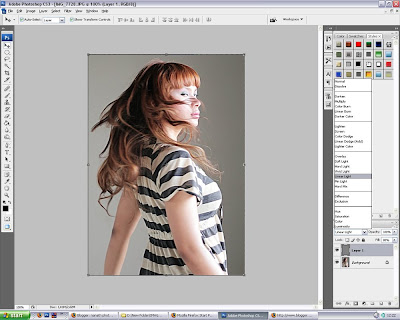
BASIC 4:
SKIN SOFTER
It's not the detail of skin softer maker. Because i plan to post more detail about How to make it softer (for beauty shot). But, i usually use this because i hate skin noise, and i always use this for make it clear. okay.. it's really simple.. all you have to do is
Select DUPLICATE THE IMAGE (ctrl+J)>FILTER>BLUR>SURFACE BLUR
Surface blur : You can Modify it as you want. Depend on you image, and depend on your taste..
Then You have to Add layer mask in picture that you blur. And click (ctrl+I) to inverse it.
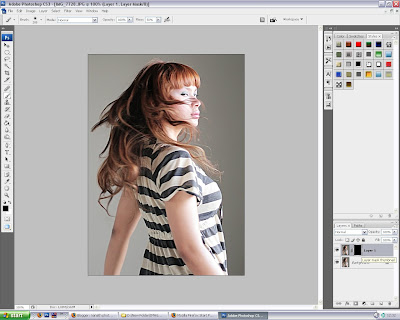
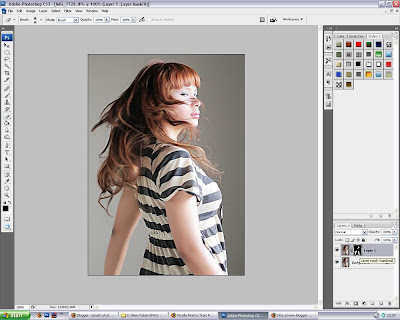
After that, select ERASE in toolbar Option, then erase the part you want to make it softer. But remember! You have to erase it in LAYER MASK, not in primary LAYER..
Like this..
BASIC 5:
DODGE/BURN
I think, most of you is already using dodge/burn for retouch your image! It's really simple, You just select the DODGE/BURN thing in your toolbar, and make your image Alive by it!
but dont forget, before you dodge/burn, you have to DUPLICATE the image!
Oke, This is what I use for DODGE/BURN:
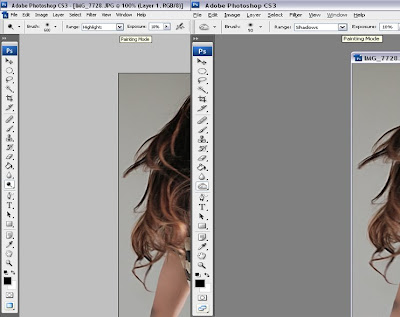
If you confused, what you have to d o with this, please DODGE in HIGHLIGHT area, and BURN in Shadow area.. :)
***
If i have more information.. i will UPDATE this Tutorial
Love, nanath


No comments:
Post a Comment