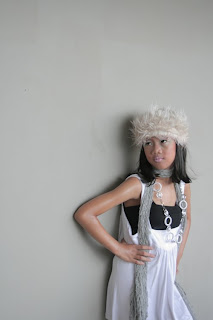
Before i give you tutorial how to edit this photo, i would you to see my photo with this tone..
Click the link below this :
GoodayIsn't SnakePurpiliasOkay, we Start with the Tutorial..
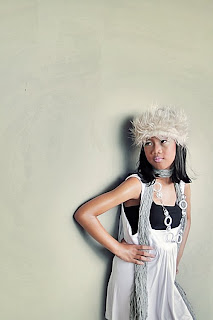
TOOL : PHOTOSHOP CS3 IS A MUSTThis is the first Photo before editting..
Step 1 :
I took this photo with Shutter Speed 1/40, F 5,6
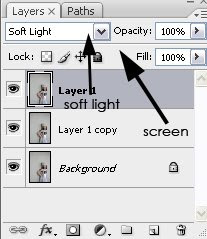
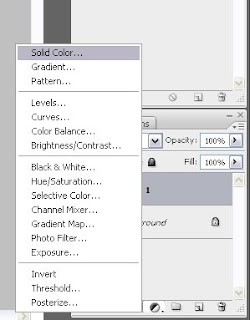
 Step 2 :
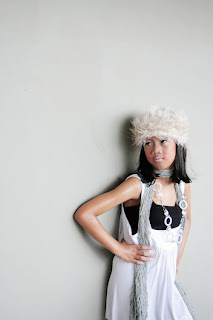
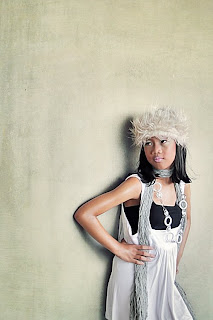
Secondly, you have to duplicate the image in Layer Options Twice (click ctrl+J Twice), then change one mode of picture into
SCREEN, and another picture into
SOFT LIGHT, then you will produce this color.
After That, please
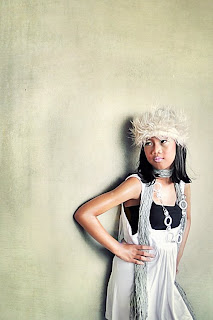
Flatten ImageStep 3 :Okay, now we play with Shadow Highlight! I REALLY RECOMMEND YOU TO USE PHOTOSHOP CS 3 , why? because Shadow Highlight options doesn't exist in CS2. :)
Okay, in PSCS3, please click
Adjustment>Image>Shadow/Highlightbelieve me, this part is really depend to your taste.. !! you can play it as you want.. ! just believe in yout seld and get the "
YOUR REAL COLOR" :)
and this is my S/H setting..
Shadow : Amount (59) - Tonal Width (35) - Radius (153)
HighLight : Amount(50) - Tonal Width(25) - Radius(57)
Adjustment : Color Correction(-100) - Midtone Contrast (23)
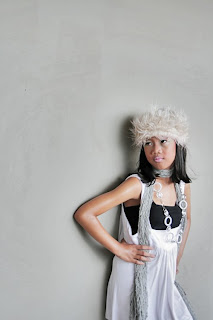
Then i produce this color!
After that, please Flatten Image ! :D
Step 4 :LET'S PLAY WITH COLOR BALANCE!! yay! i really like this part.. but believe me, this is depend to your taste.. you can play color with your style!! you can make everything here! don't try to be somebody.. just be YOU!
1) Please click
COLOR BALANCE OPTION, in this part, i make the color yellow dominant, and i give a little green and a little cyan, Don't forget to give a HIGHLIGHT touch in color balance option, i think it will make your picture a more colorful.. :)
ATTENTION!! You don't have to be worry if you like wall color, but it doesn't match with the object (model), because in this part, i want you to 100% masking at the model area. remember! FULL MASKING! (if you don't understand what is it, it means, you have to erase the color balance area, and make it clear). You have to do this patiently, don't be rush.. do it neatly.. :)
2) after that, please fill the masking area with brush with OPACITY 30% in layer mask (but this part is really depend to your image, the opacity might be 25%,20%, etc)

yea, this is what i mean with LAYER MASK
this part really useful, to make the picture and the wall's color are blending
3) Use PHOTO FILTER to make the color more vibrant.. :D if you need to mask it, just mask it,.. mmpphh.. this is really depend on your taste of color! believe me :D
then, you will produce this kind of color

After that, please Flatten Image :D
Step 5 : 1) duplicate the image
2) select Filter>Noise>Reduce Noise (10,0,100,0) You have to set the option into this..
3) select Filter>Other>High Pass (2,8/2/1(depend into your picture)) Set The Picture Option into
LINEAR LIGHTThis part is really useful for make your image sharper!!
Then, Flatten Image
 Step 6 :
1) Give a Texture into your Image, for make the wall brighter and more vibrant! I recommend
DEVIANTART <<< style="font-weight: bold;">OVERLAY, then
mask the model part..3) if you don't like the texture's color, you can change it with Color Balance, please select
Image>Adjustment>Color Balance and you can change the texture color as you want!
okay, for my picture.. i produce this color..
 Step 7 :
Now, please do DODGE/BURN
the key is!
DODGE HIGHLIGHT IN HIGHLIGHT AREA, AND BURN MIDTONES IN SHADOW AREA.. Once again! this is about your taste, you can burn and dodge as you want, but don't do it TOO MUCH, okayy?
oh ya, if you feel your model (object) is too dark, you can give CURVE into it,
1) please Marquee the model with eliptical marquee
2) click right>feather>100/150
3) light the model with curve as you like
okay, now i produce this color..
Okay, That the last Process.. if you want to make the Picture better.. you can do as you like..
i can give you an option..
1. You can play color with Selective color
2. You can change the light with Render (filter>render>lighting effect)
3. You can add some flare with lens flare(filter>render>lens flare)
4. You can make your picture more vibrant with Photo Filter
That's All from me!
HAVE FUN!!my last photo
BEFORE AFTER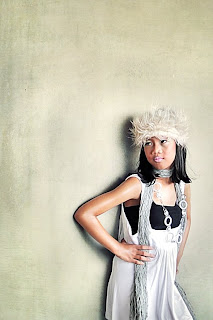 Love, nanath


